An easy-to-follow homemade sushi tutorial with lots of tips, tricks, and photos to help you roll like a pro along with a sushi roll and sauce recipes galore!
HOME MADE SUSHI: TIPS, TRICKS AND COATINGS
Let’s dive in! It may seem like a lot to buy at first, but most ingredients become staples [like sriracha + sesame seeds] and non-perishables like nori, sushi rice, and vinegar will last a ridiculously long time in your pantry. You’ll end up with 4-6 sushi dinners for the price of one in a restaurant. But most of all, it’s really fun! Invite some friends and go crazy.
As a bonus, this is one of the few times it is socially acceptable to say “Here’s everything you need, now make your own dinner!” Set all your ingredients and let your friends and family create your own rolls!
I’ll walk you through each step in the post, and then I’ll include a printable cheat sheet at the end to make your new sushi adventure even easier.
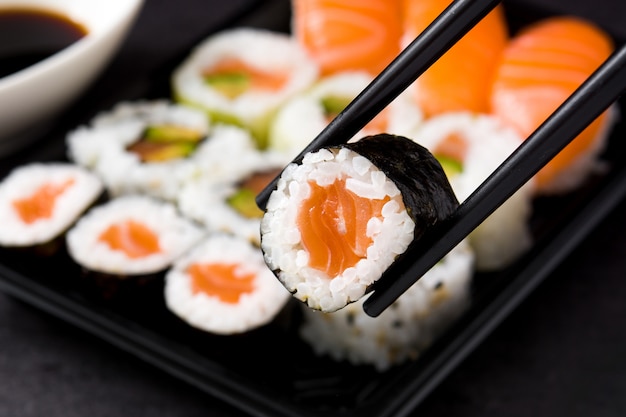
Don’t be intimidated: rolling sushi is 100 times easier than it sounds! Your rolls may not come out in a decent 5-star restaurant on the first try, but it won’t be long before your creations are so pretty you’ll want to instagram them.
Instructions
STEP ONE: Prepare your sushi rice on the stove or using a rice cooker. Quinoa works great too!
STEP TWO: Season the rice with seasoned rice vinegar or a combination of rice vinegar, sugar and salt. Pour over rice, fluff with fork, taste and adjust as desired. Remove the rice from the heat, mix in a bowl and set aside.
STEP THREE: While the rice is cooking / cooling, prepare your vegetables! Cut into matches and set aside. Once the rice is ready, you are ready to roll!
STEP FOUR: To avoid messy cleaning and washing, wrap your bamboo mat in plastic wrap. Put a nori sheet on top and have your rice!
STEP FIVE: Use a spoon to spread a thin layer of rice over the seaweed sheet.
STEP SIX: Place your ingredients in the center, very close to each other and practically in a small pile of vegetables.
For the rice inside, line your vegetables / seafood on top of the rice.
For the rice on the outside, flip the nori sheet so that the rice touches the plastic wrap, then add your vegetables to the seaweed-only side.
STEP SEVEN: roll, squeeze, repeat: hard to explain … but easy to do! The first roll will join the ingredients to the center. Roll up about 1/4 of the mat and gently squeeze (so that it sticks) and unfold the bamboo mat. Repeat the process until you have rolled the rice leaf, seaweed and vegetables in a spiral. Give it one last squeeze to close the deal.
STEP EIGHT: Cut into bite-size discs with a freshly sharpened chef’s knife. If you’re covering your sushi with sashimi or avocado, wrap the roll tightly in plastic wrap first before cutting it. This will keep everything nice and clean and avoid the horrible act of throwing avocado slices all over the kitchen. Although if that sounds like fun, stay away! I’ll keep the saran wrap!
Next, add all of your favorite ingredients and set up some dipping sauces.
Enjoy!